As suspected, my soil is very alkaline!
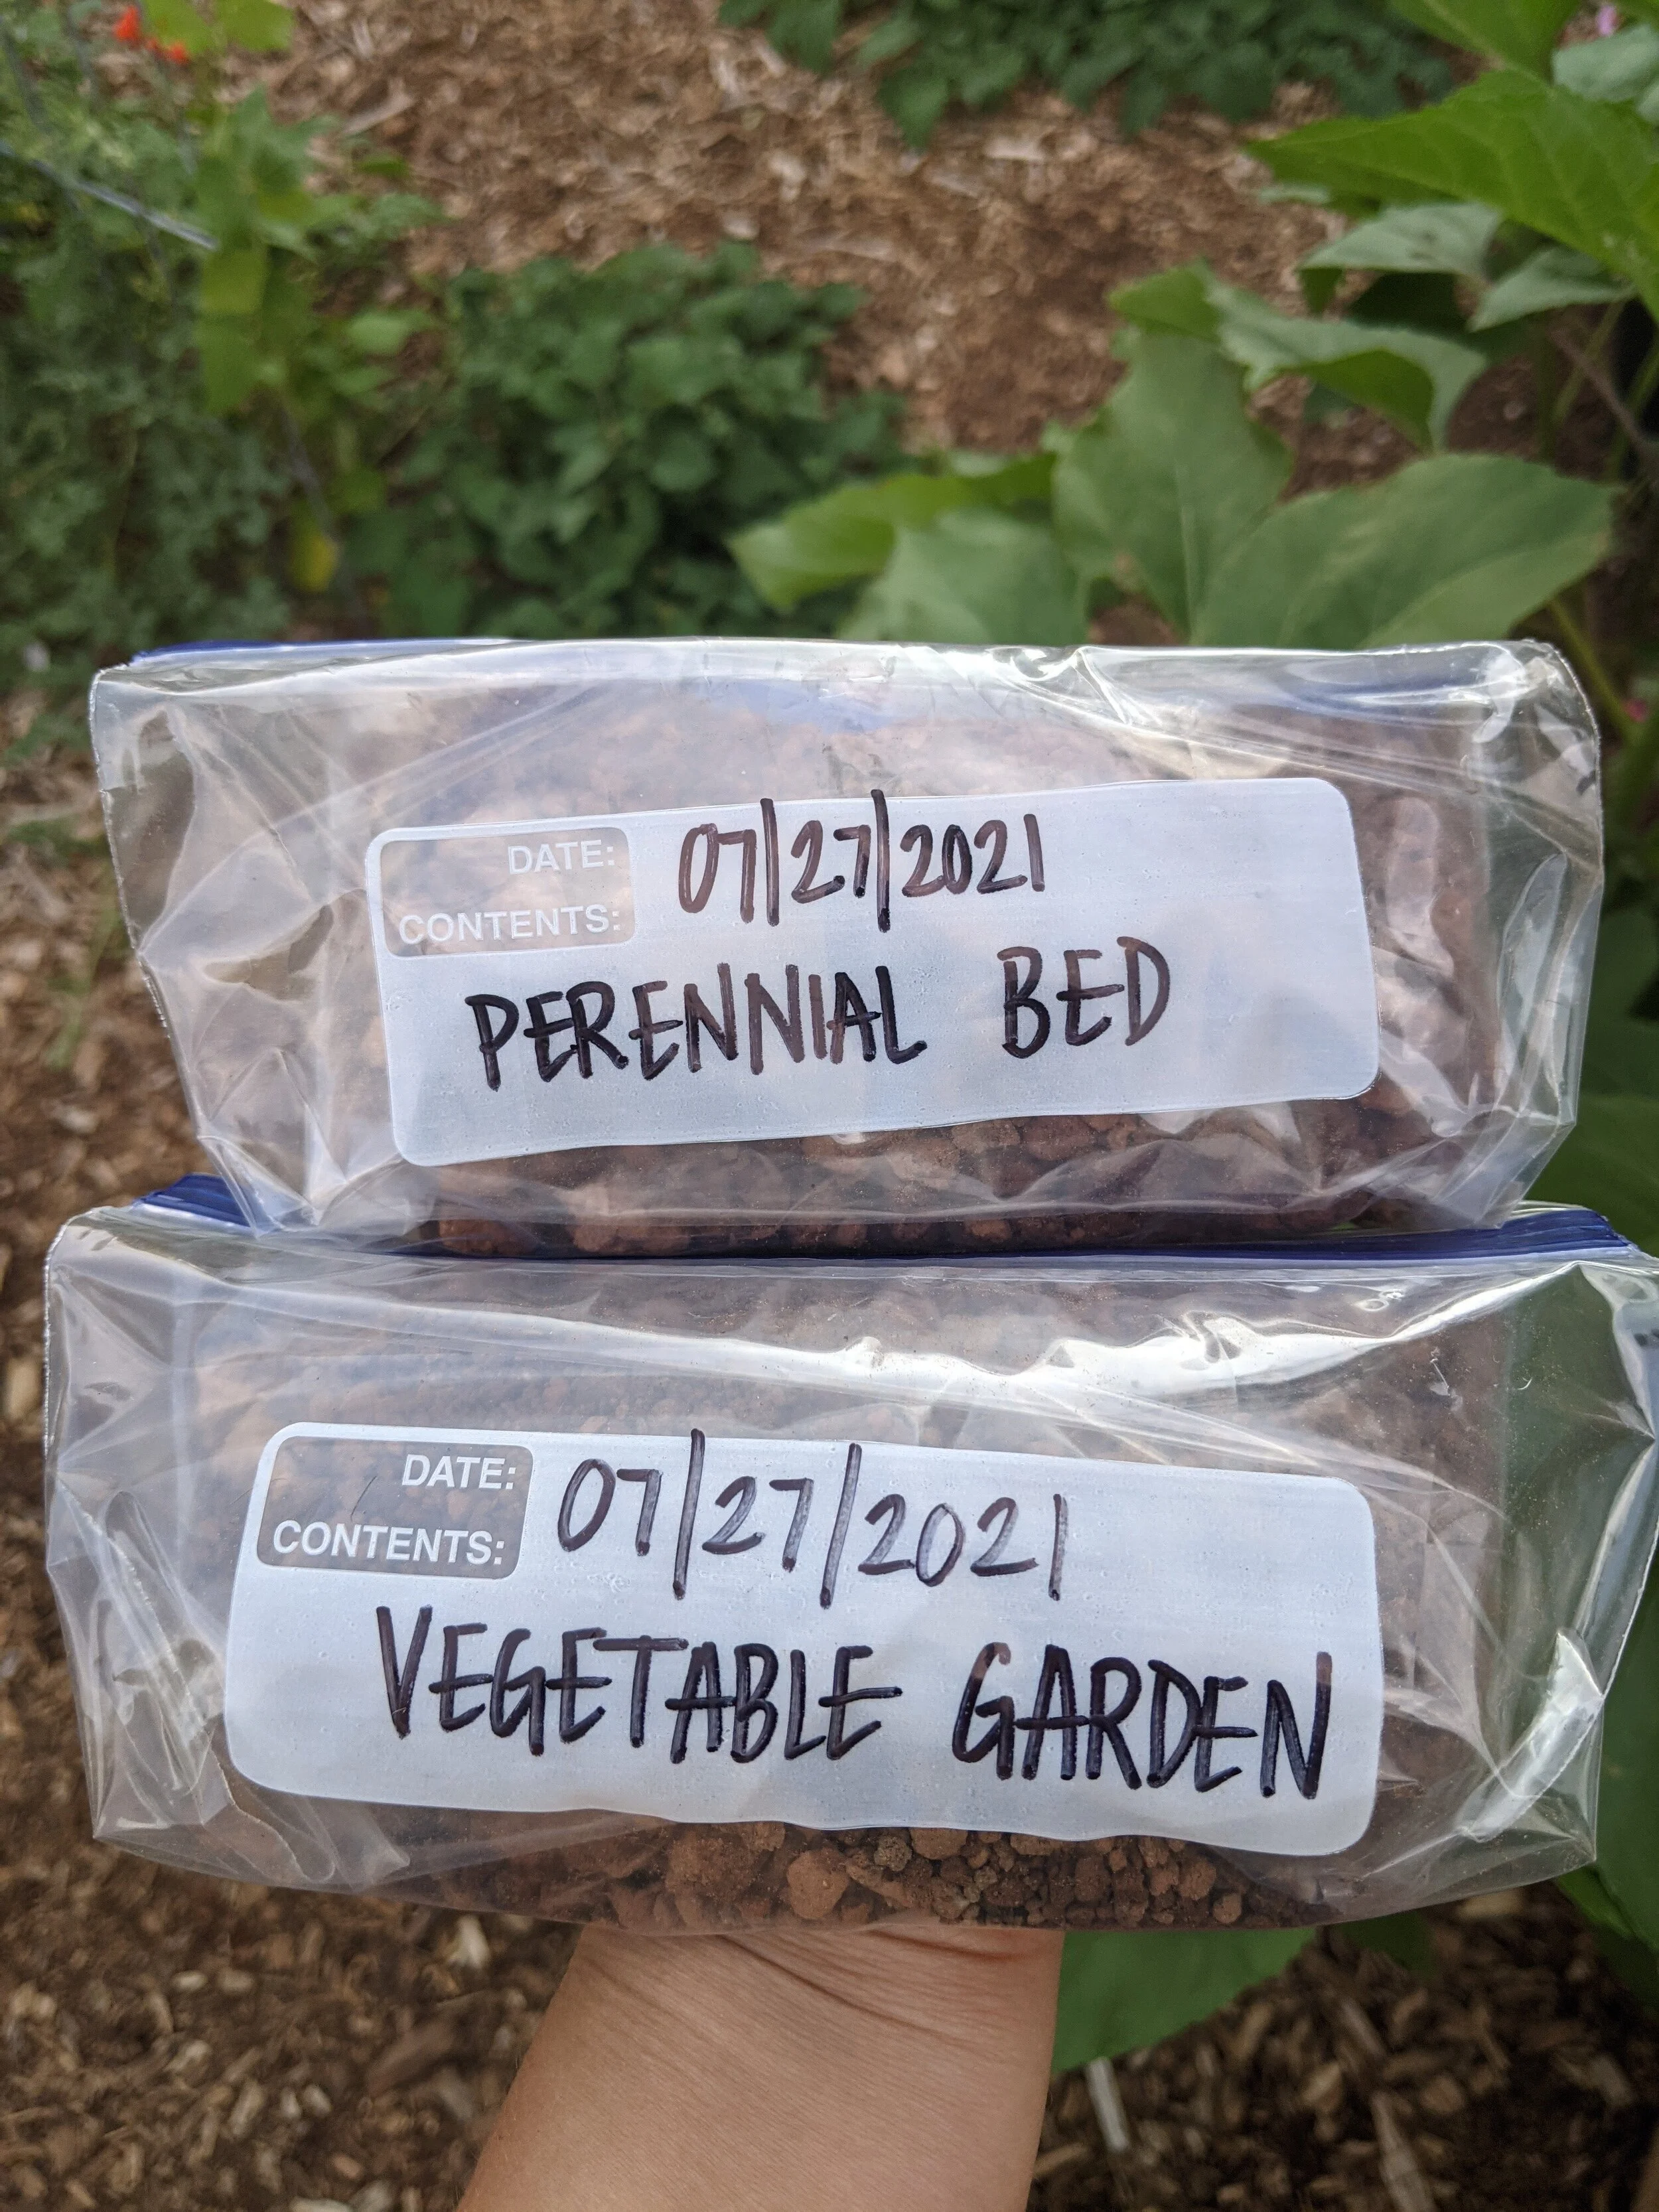
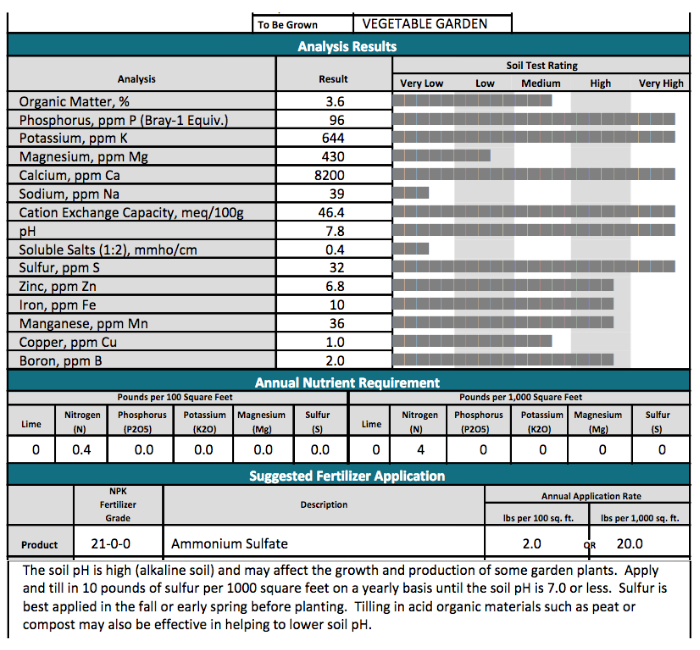
We live in the west, so this makes sense, but I did not anticipate how high the pH would truly measure. The sample from the backyard perennial bed had a pH of 8.1! The sample from the vegetable garden had a pH of 7.8. Although plants are very adaptable, most prefer to grow at a pH between about 6.0 and 7.0. So basically (no pun intended), the soil is very basic!
On the flip side, the soil was not deficient in any key nutrients. In fact, it was High in many, including Calcium, Iron, Potassium, and Phosphorous. This could be partly because the soil has a high Cation Exchange Capacity—or ability to “hold” onto things! Many clay soils have a high Cation Exchange Capacity because they have a lot of surface area. You can take a cup of sand and a cup of clay, and the clay will hold onto many more ions and molecules, simply because there are so many more fine particles of clay in the same volume, than there are of sand. With that said, the soil is holding onto the necessary nutrients, there are just issues of bio-availability of said nutrients to the plants. Therefore, the chlorosis isn’t being caused by a true lack of iron—rather, the high pH is preventing the iron from being made available to the plants. Also, the blossom end rot in the tomatoes isn’t being caused by a true lack of Calcium—rather, the high pH is binding up the calcium in the soil, and preventing it from being taken up by the tomato plants. Truthfully, a deficiency in one nutrient or another would have been easier for me to treat, but at least, now I have answers and can move forward in making improvements.
The lab provided suggestions for how I can work to lower the pH, by utilizing Ammonium sulfate fertilizer, elemental sulfur, and compost/peat moss. I’m not certain I will use the exact fertilizer they recommended, especially in the vegetable garden, as I try to keep things as organic as possible. I will, however be amending the soil well this fall, and applying sulfur per their recommendations.
Salt is not an issue
Luckily for me and contrary to what my friend in the master gardener program told me, my soil is not high in soluble salts, so salinity is not an issue. This is good to hear, because we have heavy, compacted clay, and I think Gypsum could help. Up until now, have been hesitant to use gypsum because I have been told that it can increase soil salinity.
I asked Espoma for Organic Recommendations
Out of curiosity, I reached out to Espoma, makers of the TomatoTone, HollyTone, BulbTone, BioTone Starter, and IronTone that I have been using for years, to see if they could give me some suggestions based on my soil test results. Here is what they recommended:
Soil Acidifier
All Season Lawn Food
I’ve already got a 30 pound bag of Soil Acidifier on it’s way. Interestingly, it includes sulfur and gypsum, both of which may tag team over time, to improve both pH and soil texture.
This is just the Start
Improving soil is a continuous process, but now that my soil test results are here, I feel confident in moving forward with amendments. As I have mentioned, we have heavy clay that is prone to compaction. So more than just issues with soil chemistry, in the form of high pH, the soil also has some physiological shortcomings when it comes to texture and drainage.
We had a wet spring this year, and it revealed definite issues with drainage. For example, Hardy Hibiscus plants are touted as great “bog plants" and the drainage was so lacking in areas, that I outright lost a couple hardy hibiscuses. They started greening up, I saw eyes forming, and then, when they didn’t emerge, I dug down in the mucky soil to find rotted, squishy roots. So disappointing! I also lost several other plants. Heucheras showed new growth and then just died; I found them with soggy roots. A few tomato plants started yellowing and getting blistered stems, before basically loosing all of their leaves and dying. A new honeysuckle plant sat in wet clay mud and died. And so on and so forth. I had none of this loss last year, but then again, it wasn’t so wet. Moving forward, this issue with drainage needs to be addressed.
A local veteran gardener that I am in regular touch with suggested I do something quite unconventional and out of the norm to improve the compacted clay. I practice deep mulching utilizing arborist wood chips in the vegetable garden, and have for years. The idea is that as this top dressing breaks down, it will eventually get turned into the soil and improve the overall consistency over the years. At the same time, it helps massively with weed supression. I need something less superficial, however, than just back to eden gardening practices. She suggested that I used a bulb planting auger and my drill, to dig several holes throughout the garden this Fall, and backfill them with a some sort of alfalfa pellets or food scraps. The idea being that worms will channel through the dense soil to get to these columns of “food”, oxygenating the soil along the way and enriching it with their litter. I am totally open to trying this idea, and plan on pursuing it utilizing a combination of peat moss and alfalfa pellets—both of which are acidifying.
The other alternative we have considered is tilling under the wood chips that have been breaking down on top of the soil for the last two years. I am hesitant, however, because I would hate to destroy the mycelium that has been developing over time, and worry about any nitrogen robbing or other ill-effects that might result.
And so, there you have it—I finally got my soil tested. The process ended up being quick and painless. I was able to take the samples myself and I got my results lightning fast. I was able to use the results to come up with a game plan to make improvements. Have you got your soil tested? What’s holding you back?


